 Template to Launch
Part 11 of 11
Images, video and file uploads in a builder
How a hosted website builder stores the photos, video and files you upload, what counts toward storage, and how to keep your images small.
Last reviewed
In a nutshell
- Every file you upload goes into one shared place, often called the media library.
- Files take up storage, and your plan sets how much you get.
- Small, well-named pictures keep your site fast and your storage free.
Where your files go
When you add a photo to a page, the builder doesn't just paste it in. It keeps a copy. That copy lives in a media library. This is one shelf for all your uploads.
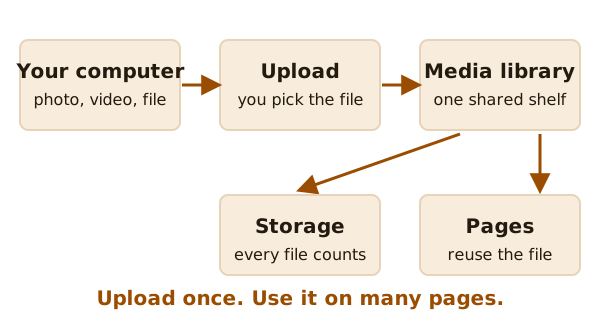
WordPress.com is a good example. Its help page says all the images, documents, videos and audio you have uploaded are stored in the media library.[1] Other builders use other names, like "files" or "assets". The idea is the same.
Two handy things follow. You upload a file once and reuse it on many pages. And you have one place to look when you want to find or remove something.
Don't expect folders, though. On WordPress.com, the media library doesn't have folders or categories.[1] You find files by searching. So give your files names that you can search for.
Ways to add a file
Most builders give you two or three routes:
- Drop a file straight onto a page while you edit.
- Open the media library and upload there.
- Paste a web address that points to a file.
WordPress.com lets you upload from your computer or from the URL of a media file.[1] A URL is just a web address. Other builders may offer fewer routes. Look for an "Upload" or "Add media" button.
Storage is a limit
Your files take up room on the builder's servers. That room is your storage. Each plan gives you a set amount.
On WordPress.com, free sites include 1 GB of storage for media files.[2] A GB, or gigabyte, is a big unit. Even so, a lot of large photos can fill it.
Paid plans usually raise the limit. The same help page lists "increase storage" among the extras that come with paid plans.[2] That's why storage is the first question on the plans and limits page.
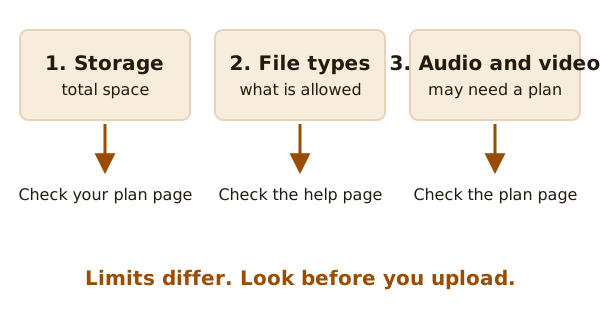
Check three things on the plan page and the help page before you upload a lot:
- How much storage you get, and what counts toward it.
- Which file types are allowed.
- Whether audio and video need a paid plan. On WordPress.com, uploading audio is listed as a paid feature.[2]
Video files are usually bigger than photos. Your builder's help page says whether you can upload video directly. The other option is to show a video from somewhere else on your page. That is called embedding.
Keep images small
Pictures are heavy. Google says images are often the largest contributor to overall page size, which can make pages slow and expensive to load.[3] Big files also eat your storage.
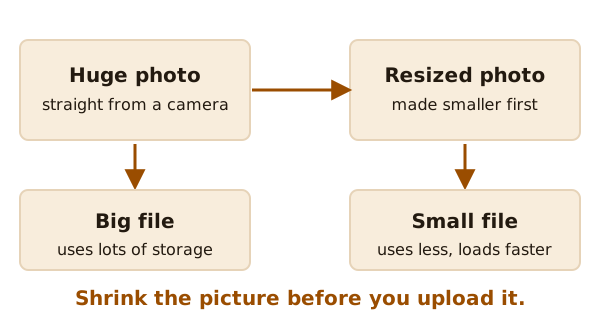
So shrink a picture before you upload it. Your builder may shrink images for you, or it may not. Check its help page, and don't count on it.
Don't make a picture so small that it turns blurry. Aim for sharp but not huge.
Name your files and describe them
Two small habits help a lot.
Give the file a plain name. Google says a name like my-new-black-kitten.jpg is better than IMG00023.JPG.[3] It also helps you find the file later, since there are no folders.
Add alt text. This is a short sentence that describes the picture. Screen readers read it aloud for people who can't see the image. Google says alt text is the most important attribute for giving more information about an image.[3] Most builders have an "alt text" or "description" box when you click an image.
A quick routine
- Resize the picture first.
- Give it a plain name.
- Upload it, then add alt text.
- Now and then, open the media library and remove files you no longer use.
Before you leave a builder, you'll want your files too. The leaving a builder page explains what you can take with you. Before launch day, the pre-publish checklist has a step for checking your images.
Sources
- Manage your site's media in WordPress, WordPress.com Support (accessed 2026-11-03)
- Choose a WordPress.com plan, WordPress.com Support (accessed 2026-11-03)
- Image SEO Best Practices, Google Search Central (accessed 2026-11-03)